
Time to read: 22 minutes | Execution time: 40 minutes or less
If you’re one of the relatively few lucky people who’s able to realize the insane potential that native advertising is dropping right before your eyes – then you’re about to be in for a tasty treat…
We’re going to guide you through each step of the process in setting up a native advertising traffic arbitrage platform that could very well become your next multi-million dollar online venture (doubling as a retirement plan).
Are there any other business models out there that can be launched for about $40, and be made profitable in a matter of days?
If there are – they probably aren’t businesses that also build brand equity, provide unlimited earning potential, and allow you to “work” while you sleep…
Native advertising is a process that does take persistence to be done correctly. But, once you’ve learned the essentials and built a strong foundation – a native business model can be automated, scaled and leveraged to ultimately provide you with the amazing freedom that you’ve been searching for.
So let’s jump right into this post and get you started with our step-by-step guide that takes you from “feeling a little bit unsure” about native advertising to owning an authentic business asset in 40 minutes or less.
Step #1. Learn to Approach Building Your Website the Right Way (Feed Them What They Want)
Are you in tune with the massive amounts of content that people from all around the world are demanding on a daily basis?
If you aren’t, then you definitely need to be!
Because providing people with an abundance of the content that they already desire is what’s going to practically ensure the success of your native advertising empire.
Native advertising has very little to do with what you want (that would be selfish).
Instead, this space is mostly about what your audience wants (give them an abundance of valuable content).
If you haven’t thought about approaching a business like this before, then this may require a slight change in mindset before moving on.
But, it will be well worth the paradigm shift, if you can just trust us on this one…
So when you’re choosing the niche that your entire brand will revolve around in the next step, please keep in mind that meeting a BIG consumer demand is what’s going to be most important here.
This doesn’t mean that you can’t enjoy the type of content that you create. You should absolutely find some sort of overlap between what the market wants, and what you feel comfortable building a decent slice of your life around.
But, we do have to suggest that you respond to market demands first and foremost!
Now that you understand what you should be looking for when building a native brand – you can start to think about all of the different potential niches to attack.
Step #2. Choose Your Viral Niche
Health, wealth and sex are the 3 “ultimate” niches that internet marketers have come to love.
But, when it comes to arbitraging viral content online – there’s also a ton of celebrity entertainment, news stories, sports drama, funny pictures and general silliness that you may need to be prepared to publish if that’s what your market wants to see.
This is about giving people what they want, remember! If you can deliver one or all of these topics to your audience over a consistent timeline, you’ll more than likely be rewarded generously for your efforts.
While you can absolutely build a profitable viral content website that tackles all of these topics, I’ve also witnessed a lot of success with niched-down websites.
It will be completely your decision whether you want to build a general viral website that publishes content from multiple hot categories, or pursue a niche 1-topic website strategy that crushes it with viewer retention.
I do have to say that the “anything goes” type of viral website is advantageous for providing you with the complete freedom to publish whatever the hell is going viral in just a matter of minutes! There are very few rules with this model of viral website other than native ad network compliance. The opportunities are limitless and everything is fair game if you decide to use this strategy.
To see good examples of this “general viral” type of website, you can check out NextShark, Distractify or the infamous ViralNova that started it all.
However, you may also want to consider building a “1-topic” native traffic arbitrage site that focuses on a single viral concept. Your niche platform could revolve around something like bodyweight exercises, veggie-based diets or even something as niche as “dangerous foods.”
While a niche website might limit you in terms of what you can publish content-wise, the major advantage of going this route is that you can typically build a much more dedicated fan base and e-mail list while even creating the potential to generate additional streams of revenue in the future (using CPA style offers, dropshipping or even selling your own products).
You can visit NaturalON, DreamTeamFC and HealthCentral to see good examples of niched-down websites that advertise to specific markets seeking very specific styles of content.
A bunch of us from the NativeAdBuzz Mastermind Facebook group have also been raving about The Dudes Club website which has the unique ability to create high-quality viral content targeted at an extremely niche audience, run Taboola native ads and promote CPA style affiliate offers to their readers. Not to mention they’re also building great brand equity and getting backlinks from websites like ours – because they know how to run a badass niche native site.
Important note: Before deciding on a native brand to pursue…you should take a hard look at what is going viral across the web. It is usually best to take a concept that is already working on the internet and run with that, because this means that a niche has already been tested and proven to work by others.
People have basically already paid lots of money to validate niches for you.
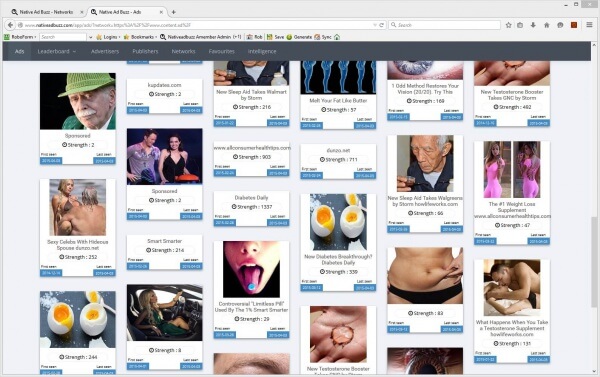
We recommend signing up for a 3-day trial to NativeAdBuzz for only $1 to see what kind of native ads are going viral across the web right now. This way, you can see what’s actually working before committing to building a brand that might not even be in high-demand.
Pro tip: If a single ad has been active on NativeAdBuzz for at least 2 weeks…something about it has taken OFF and the piece of content is certainly viral. You can even cross reference the strength scores and numbers of social shares of native ads, as Native Ad Buzz also tracks this. You’ll be able to find these specific kinds of super-viral native ads by adjusting the “duration” filter setting on your “Ad” dashboard within NativeAdBuzz, selecting the social sharing toggle, and sorting by strength.
Step #3. Brainstorm a Brand Name, Register Your Domain and Grab a Quick Logo
This should be a quick process. A lot of people get hung up on choosing a brand name and logo, but this shouldn’t take you too much time.
The main thing that you want to do here is make sure that your brand name is easy to spell, memorable and available as a .com domain.
You might also want to run a quick check on the Wayback Machine to make sure that your domain hasn’t been used for spam in the past (Google wouldn’t like that). If anything about a domain appears shady, simply choose a new one. No big deal!
Register your domain at Namecheap or GoDaddy and order a logo from Fiverr, or for a more professional logo try designcontest.com.
If you can use Photoshop or GIMP, you can obviously create your own simple text-based logo in a few minutes rather than ordering one.
Step #4. Get Solid Hosting
Another area where people get pretty intimidated is hosting. But we’re here to assure you that this is another step you can breeze right through. This is easy.
The main thing you’re looking for in a hosting provider or hosting plan is the ability to handle hundreds of thousands to millions of clicks without having your server crash.
While a dedicated hosting solution is perfect for the big boys, getting a VPS hosting plan is an excellent option for most people just starting out in native. With a VPS, you’ll get the power of dedicated hosting without the price tag or complexity.
If you’re on a boot-strapped budget, you can definitely get away with using an ultra-cheap shared hosting package and a good CDN for the time being. This way, you can at least start testing the waters of native advertising and level up your hosting package when you’re ready.
You generally can’t go wrong with Hostgator, Dreamhost or Bluehost. Get your hosting and let’s go!
Step #5. Point Your Web Host’s Assigned Nameservers (DNS) At Your Domain Name
This part is also very simple. You’ll basically be “connecting” the hosting plan that you purchased to the domain name that you’ve already registered.
You’ll only need to log in to Hostgator (or whichever hosting provider you’re using) then find your nameservers (there should be two of them) and “point” them at your domain name.
This simply means that you’ll be copying the nameservers given to you by your web host, and then pasting them into your Namecheap.com account (or wherever you registered your domain name – GoDaddy is the other popular option).
To be even more specific, you’ll want to edit the settings of the exact domain name that you purchased from your registrar (Namecheap/GoDaddy), and replace your domain’s previous nameservers with the new nameservers that you were given by your web host.
Once you’ve pointed your new nameservers at your domain name, your website should be online in a few minutes and ready to go.
Step #6. Install WordPress
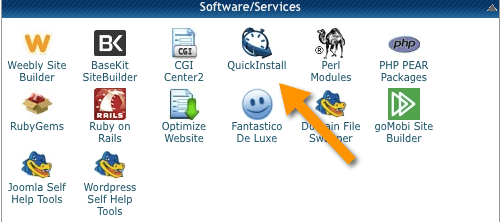
Installing WordPress is a straightforward process, especially if you’re using any of the web hosts we’ve listed above. If you’re using Hostgator, you’ll just be looking for a ‘Quickinstall’ button on your cPanel dashboard to install WordPress on your website in seconds.
Once installed, WordPress is going to provide you with the easiest and most scalable platform to run your new native business.
Big brands like TechCrunch, New York Times and Reuters all use WordPress for a reason – and you’d better believe they’re using the power of native advertising to monetize their websites…
Step #7. Add a Theme and Upload Your Logo
You’ll need a simple theme to make your website appear professional.
This is a good viral theme. There are also many other good themes out there that can be found across the web.
Again, just try to keep your theme simple, and install one that makes your actual content the focus of the website (news style themes also work well for this and can be formatted to your taste).
Free themes don’t usually look all that great, but I’m sure that you can make one work for you if you absolutely need it to.
You can also add your logo to the ‘header’ section of your WordPress site at this point, and edit some of your basic settings like “website name” and “tagline.” However, you can finalize the majority of these smaller details a little bit later…
We’re just trying to hit the essentials here to get you set up FAST (40 minutes or less).
Step #8. Install Some Important Plugins
Your fresh WordPress installation should come with some nice pre-installed plugins. You should already have WP Super Cache ready to go, so your website’s caching settings will be auto-configured. But, if for some reason your WordPress installation doesn’t already come with a caching plugin installed, then W3 Total Cache will be a good choice for you to go with.
Other important plugins that you’ll likely want to use on your website are…
- An image optimization tool like EWWW Image Optimizer (important for reducing image file sizes and making posts load faster)
- Google Analytics by Yoast for analyzing your traffic (you’ll need to sign up for actual Google Analytics ASAP if you haven’t already)
- The social sharing plugin of your choice such as Monarch (for Facebook/Twitter shares and easy marketing)
- You may also want to try using a post slider to break up your content into individual pages and maximize ad impressions/click throughs (alternatively: use this golden nugget to create manual page break tags)
These plugins will definitely take care of you for now. You can always optimize and refine your website’s plugins at a later point.
Step #9. Integrate Your CDN
Getting a CDN (Content Delivery Network) set up will distribute your content faster than you can imagine while significantly boosting your page load speed as well. It can also provide you with quite a few other goodies…
This is really important for making sure that you’re doing everything you can to keep viewers insanely happy on your website.
I’ve used Amazon CloudFront to set up CDN’s in the past, but I’ve also found that CloudFlare provides a much simpler solution for getting everything ready to go without the major hassle.
I always have to lean towards the time-saving solution, so I have to recommend CloudFlare because of their extremely simple set-up process. You can start with their free plan if you like, then upgrade to their Pro plan at some point if you decide that you like it.
Note: All that you have to do to set up your CDN using CloudFlare is plug the NEW nameservers assigned to you by CloudFlare into your domain registrar (Namecheap/GoDaddy) account once more. Yes, you will be changing your nameservers again at this point exactly as before (like in step #5) – but this is a crucial step which is actually a LOT simpler than Amazon makes it.
Think of this step as supercharging your website, improving your bounce rate and helping to maximize your earnings.
Step #10. Quickly Set-Up Your Social Media Accounts

You’re going to be a brand, right? You need to at least have a Facebook page up and running. Put up a logo and cover photo, then edit some of your profile page details, and you should be good on social media for now (you might want to register with Twitter, Google+ and Pinterest soon though).
Sign up for Buffer which will let you schedule and automatically post your new blog content to your social media accounts. You can also use Hootsuite if you require more social media management.
Step #11. Use NativeAdBuzz to Publish Viral Content in Your Niche
OK – before we get into the details of how you’re going to use NativeAdBuzz to leverage the most viral content spreading across the web, we’re going to talk about the process you would have to go through without using NativeAdBuzz.
Without using NativeAdBuzz, you technically could still make all of this work.
However, there is a huge caveat.
You would be approaching this business model in the oldschool “ViralNova” type of way.
You see, Scott DeLong of ViralNova perfected this ad arbitrage business model before tools like NativeAdBuzz were available. And he definitely made this business model work very well for him.
DeLong sold ViralNova in the summer of 2015 for $100 million.
However, he also experienced hundreds of life-draining workdays in which he scoured the web for the hottest viral content by hand. He manually searched websites like Buzzfeed, Bored Panda, Reddit and Imgur for the best content that he could find so that he could curate everything which had the slightest potential of going viral.
He didn’t know for sure which pieces of web content were most likely to go viral, so he had to try them all. He was essentially playing the viral lottery at a high level with great work ethic.
You can absolutely do this if you want. It is still a viable method of pursuing this business, although an outdated one.
You’ll also probably be at a major disadvantage using these oldschool tactics, at least compared to those who have access to intelligence tools that automatically detect the “social impact” of content – or tools that direct you to the exact landing pages of the most viral content/affiliate offers running across the web.
Or…
You may want to start building the heart of your website using NativeAdBuzz’s system that automatically hand feeds you the greatest viral content running across the best native advertising networks.
Fun, emotion-inducing and high-drama viral content is going to be the lifeblood of your business over the next few weeks and months – so getting into a habit of publishing the greatest content that you can find using NativeAdBuzz will save you lots of time and help you generate lots more revenue over the long-run if you’re persistent at this.
You’ll ultimately want to make sure that each piece of content that you create and curate for your arbitrage website gives you the greatest shot at gaining maximum clicks and social shares. Your content needs to be picture-heavy with some of the latest, hottest material that you can find. We ultimately recommend using the content that you find on NativeAdBuzz for super-inspiration. Take anything that you find on NAB, and improve on it. Make it even better – and apply it to your site in innovative ways.
While copying what works is the lifeblood of any entrepreneurial pursuit…you’ll eventually be able to trust your instinct, make predictions and get a little bit bold and creative with your native ads in order to really gain an edge in this game.
Step #12. Monetize Your Website

Monetization Option #1: Native Ad Arbitrage

While there are a bunch of great native ad networks to choose from, to get started immediately, you can apply to Revcontent, Gravity, Content.ad and Ayboll for near instant approval in most cases.
You will typically be able to apply to native networks as a publisher (content creator) or as an advertiser (affiliate). Some will allow you to apply as both.
Once approved to some native networks, you’ll soon be able to integrate the widgets from your native networks of choice into your website. On Content.ad – this process is as simple as hitting the “New widget” button on your Widgets dashboard.
It’s important to know that many of these native networks will have to manually approve of any widgets that you want to create – but you should hear back fairly quickly once your widgets have been approved.
Since Ayboll will allow you to create widgets instantly without any approval process, you may want to consider testing some of their widgets out. The goal here is to simply get some widgets set up as quickly as possible so that you can begin tracking your site’s engagement and clicks.
It will take some time to determine the best widgets to use for your unique site, but most people do well starting out with native widgets placed below content (after entry), in the primary sidebar (on the right side of your website), and even in-content.
Just to be clear, your goal with native ad arbitrage is to make MORE money from your visitors than you originally spent to acquire them. By using great native ad networks, publishing quality viral content and acquiring solid sources of traffic – you’ll eventually be able to work the arbitrage process in your favor and become a very happy marketer if you can just stick with the proven template…
Quick note: A reader reached out to us and mentioned that we didn’t include anything about AdSense in this article. This is an important piece that we missed. It’s almost always worth applying for an account with Google AdSense if you don’t already have one, as they very well may offer the highest payouts for your particular niche. It’s always worth testing, but make sure to pay close attention to Google’s strict terms and conditions when you’re arbitraging AdSense. You can even use Adngin which enables you to optimize your adsense widgets through continous testing. I have it on good authority they will soon be expanding to adding some of the native networks as well!
Monetization Option #2: Advertising with Native (Optional)
Advertising affiliate offers using native networks can be a very lucrative endeavor for many. For this to work, you’ll need a few additional tools.
You’ll first need some good tracking software such as Thrive or Voluum to make sure that you’re collecting valuable visitor data (country, operating system, time of purchase etc.) and to ensure that your conversions are being accounted for. If you’re serious about this, then good tracking software will be one of the most important investments that you make.
If you’re really boot-strapping your native venture, you could start out using a free tracker like Prosper202 or even something like AdsBridge – but we recommend moving up to something more professional as fast as you can (go “all in” ASAP).
You’ll also need access to a good affiliate network or two to begin advertising your offers using native. ClickBank and CJ are two of the largest affiliate networks – but we also recommend checking out OfferVault to browse various offers you’d like to run before applying to ad networks. Offervault will show you exactly which networks are providing certain offers (so that you can apply to the networks with the offers that you’re most interested in).
Once you have some tracking software set up, and you’re approved at an ad network or two, you’re officially ready to begin your affiliate marketing venture using native ads.
You’ll initially want to search NativeAdBuzz for the hottest campaigns that have been running for at least a couple of weeks. These are the money campaigns that are in-demand. It’s fairly straightforward to find a working landing page and offer with NAB, and then improve on it (if you want) to make it an even more profitable campaign.
Step #14 (Because 13 Is Unlucky). Publish Viral Content and Stay Persistent
It might sound really cliché at this point, but yes, this is largely going to be a process of testing, tracking and doing some “work” (although most of the work has already been done for you by others).
I honestly wouldn’t even consider much of this to be “work” when you’re developing life-long sales skills and figuring your way out of the rat race.
Learning how to do native advertising effectively is something that you’ll be able to leverage into so many other areas of your life.
But for now, you’ll want to just focus on consistently publishing viral content as often as you can. Don’t burn out or anything – but now is definitely the time to get in while you can.
To prevent burnout – sticking with one “general viral” arbitrage website (like NextShark), one niched-down website concept (like DreamTeamFC) or one target audience (like The Dudes Club) is going to be key to making a lot of this work for you.
By getting to know your general (or single) audience with laser-focus, and being persistent, you’ll be amplifying your odds at finding success with this business model while most others are trying to build 7 different websites. There’s absolutely nothing wrong with testing multiple different website concepts – but finding the one concept that just feels “right” and works for you is what’s going to allow you to zone in and build a kick ass native arbitrage website.
Most people will give up at this after 3-5 weeks. It can be difficult to dodge all of the new shiny objects that will be tossed in front of you if you’re involved in the IM space. We urge you to keep going, and make sure you have the budget to give it at least 3-5 months before you even start thinking about anything else.
Don’t think too much, just take consistent action!
We’re confident that native advertising is going to be one of the hottest business models, if not the hottest business model around for quite some time. We’re talking years here.
It’s still also important to get involved with this now while relatively few people are aware of the potential that this method brings. This is such a cool, fun and fulfilling way to make a living that I’m always happy to tell even more people all about native advertising.
Step #15. Remember the Power of Paid Media to Light the Fuse
Times have changed since the days of ViralNova, and there is no such thing as something for free (except this blog post of course). There is no longer such a thing as free traffic, and don’t kid yourself that there is. If you want to scrabble around all day for pennies then be my guest, but I have better things to do with my time.
These days it is necessary to use paid media to get your content in front of people and give it the boost it needs, before it can fly for itself. Think of paid media as the propulsion to get your content up above the clutter and out of the gravitational pull.
By using Native Ad Buzz you can find successful ads which have sent content viral (by comparing the ad strength and social impact scores) and also see which native networks they were promoted on. You can then base your ads on your findings for a huge head start.
You can also use other traffic sources such as Facebook ads to promote for cheap clicks, but be wary of the T&C’s.
One last thing:
Don’t worry about your supposed “competition.” By using NativeAdBuzz you should have a pretty big edge over most who are blindly throwing up articles they’ve pulled from BuzzFeed and Reddit.
Besides just that, there is an endless demand for new content that simply won’t ever be filled. Markets are starving for the latest viral pictures, celebrity news, sports entertainment, travel information, health offers, weight loss supplements and so many other opportunities available to where you shouldn’t ever be concerned about your competition. Just focus on nailing down your niche, put in the “work” (it’s really not work) and talk with us in 6+ months’ time to let us know how your life has changed.
If you can approach native advertising as a science using the tools that we’ve mentioned in this post, you’ll be on your way towards cracking the formula of online marketing riches that’s waiting to be seized by those who are willing to be persistent.
Budget for 3-5 months to start with and stick with it.
Are you excited?
“If you do not change direction, you may end up where you are heading.” -Lao Tzu